When your carpet gets wet, the water you see on the surface is only part of the problem. The real danger lies hidden beneath, in the padding and subfloor, where trapped moisture can lead to mold, mildew, and structural rot. Simply making the carpet feel dry to the touch isn’t enough to protect your home. A thorough job requires a specific process to pull moisture from every layer. We’re going to show you how to dry wet carpet the right way, focusing on the techniques that prevent those costly, hidden issues from developing. Think of this as your guide to not just drying your carpet, but truly restoring your room to a safe, healthy state.
Key Takeaways
- Prioritize Safety and Damage Control First: Before you even think about drying, your immediate priorities are to stop the water source, check for electrical hazards, move your belongings to a dry area, and take photos for your insurance claim.
- Use the Right Tools for a Thorough Dry: A successful DIY drying job requires more than just towels. Use a wet/dry vac to pull out the bulk of the water, then set up fans and a dehumidifier to tackle the remaining moisture in the carpet and the air.
- Recognize the Limits of DIY: Don’t risk your health or home on a big job. Call a professional immediately if the water is contaminated (from a sewer or flood), the carpet is completely soaked through to the padding, or you can already see or smell signs of mold.
Wet Carpet? Here Are Your First 4 Steps
Discovering a wet carpet is stressful, but taking the right actions immediately can make a huge difference. Whether it’s from a leaky pipe, an overflowing appliance, or storm flooding, your first moves are critical to preventing further damage, saving your belongings, and stopping mold before it starts. It’s easy to feel overwhelmed, but a clear plan can help you take control of the situation. Before you even think about drying, there are a few essential tasks you need to handle. These initial steps will set you up for a much smoother and more successful restoration process. By focusing on safety, stopping the source, and protecting your property, you can minimize the long-term impact. Think of this as your emergency checklist to get you through the first hour.
Stop the Water at its Source
Before you grab a single towel, your absolute first priority is to find out where the water is coming from and make it stop. This might be as simple as turning off an overflowing sink, or it could mean you need to shut off the main water valve to your property to stop a leak from burst pipes. If you can’t identify the source or don’t feel comfortable handling it, call for emergency plumbing help right away. There’s no point in starting the cleanup process if more water is still coming in. Taking this step immediately prevents a small problem from turning into a much larger, more expensive one.
Assess the Damage and Any Safety Risks
Once the water is stopped, take a careful look around. Is the water clear, or is it gray or black water from a sewer backup or flood? Contaminated water poses serious health risks and requires professional handling. If the water is deep, be extremely cautious about electrical hazards—turn off the power at the breaker box before stepping into the area. Also, consider how long the carpet has been wet. If it’s been more than 24-48 hours, mold growth is a real possibility. A quick, honest assessment will help you decide if this is a DIY job or if you need professional water damage restoration.
Move Furniture and Other Items Out of the Way
Get everything you can off the wet carpet. Move furniture, rugs, electronics, and any other belongings to a dry, safe spot. This serves two purposes: it protects your items from being ruined, and it clears the way for the carpet to dry properly. Wood furniture can stain the carpet, and wet upholstery can quickly develop mold. Place foil or plastic blocks under the legs of heavy furniture you can’t move. Be prepared that some items, especially upholstered pieces or particleboard furniture, may be too damaged to save. Acting quickly gives you the best chance to salvage your possessions.
Document Everything for Insurance
Before you move too much or start any major cleanup, pull out your phone and take plenty of photos and videos. Document the source of the water, the extent of the flooding, and any damaged items. This evidence is crucial for your homeowner’s insurance claim. Keep a running list of everything that was damaged. Having clear documentation will make the claims process much smoother. A professional restoration company can also be a huge asset here, as they know exactly what insurance adjusters need to see and can help you manage the claims process from start to finish.
The Right Tools for Drying Wet Carpet
Before you roll up your sleeves, it helps to have the right equipment on hand. Trying to dry a soaked carpet with just a few towels is a recipe for a long, frustrating day and potential mold growth. Gathering the proper tools will make the process faster and much more effective. Think of it as your DIY carpet-drying toolkit. Most of these items can be found at home or rented from a local hardware store, giving you a fighting chance to save your carpet and the floor underneath.
For Extracting Water
Your most important tool for this job is a wet/dry vacuum, also known as a shop vac. This is the workhorse that will pull the bulk of the water out of your carpet fibers. A regular household vacuum is not designed to handle water and will be damaged—not to mention it poses a serious electrical hazard. If you don’t own a wet/dry vac, you can usually rent one. Some people also use a carpet cleaner in its water-extraction mode (without shampoo). The goal is to suck up as much standing water as you possibly can before moving on to the drying phase.
For Creating Airflow and Dehumidifying
Once you’ve extracted the excess water, your next step is to get the air moving. Open up any windows you can and bring in fans—and lots of them. High-powered industrial fans are ideal, but any box fan or oscillating fan will help. Position them to blow directly across the surface of the wet carpet to speed up evaporation. In a humid climate like ours in Florida, a dehumidifier is also a game-changer. It works by pulling excess moisture directly out of the air, which helps the carpet dry faster and is crucial for preventing mold. Professional water damage restoration teams use this combination of tools to dry spaces efficiently.
For Safety and Cleaning
Depending on the source of the water, you’ll need some cleaning supplies. If the water came from a contaminated source like a toilet overflow or a sewer backup, the carpet and padding are likely unsalvageable and should be handled with extreme care. For cleaner water situations, you may still need to pull back the carpet to check the padding. If the padding is soaked, it’s best to replace it, as it’s nearly impossible to dry completely and can become a breeding ground for mold. You’ll also want a good disinfectant to clean the bare subfloor before putting everything back in place.
Your Step-by-Step Guide to Drying Wet Carpet
Once you have the right tools ready, it’s time to get to work. Tackling a wet carpet is a methodical process, and every step is important for preventing long-term problems like mold and subfloor damage. The goal is to be thorough and patient. Rushing the process can leave behind hidden moisture that causes issues down the road. Follow these five steps carefully to get your carpet as dry as possible. If the job feels too big or you’re worried about getting it right, remember that professional help is always an option.
Step 1: Extract as Much Water as Possible
Your first move is to get the bulk of the water out. A wet/dry vacuum is your best friend for this task. Go over the entire wet area slowly and repeatedly, allowing the vacuum to suck up as much moisture as it can. The more water you can pull out at this stage, the faster the rest of the drying process will go. Don’t be surprised if you have to empty the vacuum’s tank multiple times. This initial extraction is the most critical step in any water damage restoration effort and makes a huge difference in the final outcome. Be patient and thorough—every pass with the vacuum helps.
Step 2: Use Towels for Remaining Dampness
After you’ve vacuumed up all you can, it’s time to switch to towels for the remaining dampness. Grab some clean, dry towels (white ones are best to avoid any color bleeding) and lay them over the wet spots. Walk on the towels or press down firmly with your hands to help them absorb the leftover moisture from the carpet fibers. As the towels become saturated, swap them out for fresh, dry ones. Keep repeating this process until the towels are barely picking up any more water. This is a hands-on step, but it’s effective for pulling out that last bit of surface water that the vacuum couldn’t reach.
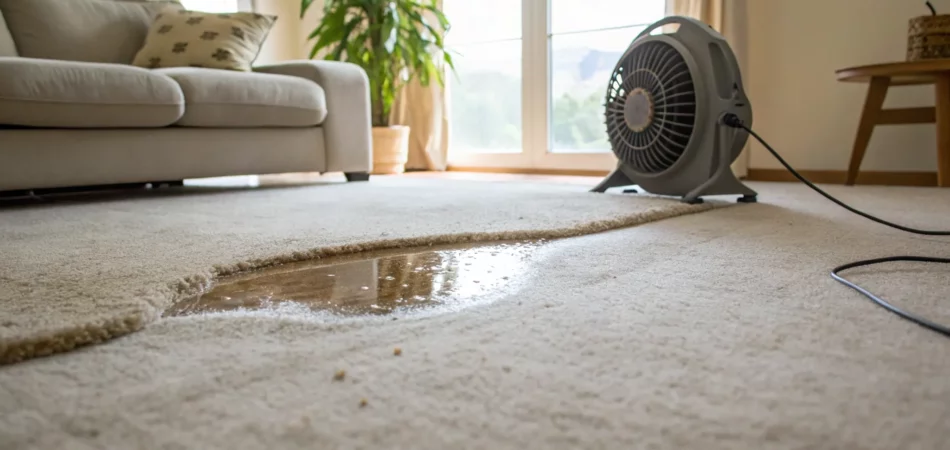
Step 3: Position Fans to Maximize Airflow
With the excess water removed, your next goal is to speed up evaporation with good old-fashioned air. Create as much airflow as you can by aiming high-powered fans directly at the surface of the carpet. If you have ceiling fans, turn them on high. If the weather outside isn’t too humid, open up windows to get a cross-breeze going. The constant movement of air across the carpet will help carry moisture away. For a truly effective setup, you can rent industrial-grade carpet fans, which are the same tools professionals use to ensure a complete restoration and prevent musty odors from setting in.
Step 4: Run a Dehumidifier to Pull Out Moisture
While fans move damp air around, a dehumidifier pulls that moisture out of the air. This is an essential step, especially here in humid Florida. Place one or more dehumidifiers in the room with the wet carpet and close the doors and windows so it can work efficiently. The machine will draw moisture from the air, the carpet, and even the surrounding walls, which helps everything dry faster and significantly reduces the risk of mold growth. You’ll need to empty the dehumidifier’s water collection tank regularly. This step is a key part of professional environmental cleanup for a reason—it creates a dry environment where mold can’t thrive.
Step 5: Don’t Forget the Carpet Padding
What lies beneath your carpet is just as important as the surface. Carpet padding is like a giant sponge, and if it got soaked, it can hold onto moisture for a long time, leading to mold, mildew, and rot. Carefully pull back a corner of the carpet to check the padding underneath. If it feels saturated or squishy, it will be nearly impossible to dry completely and will likely need to be replaced. Ignoring wet padding is one of the biggest mistakes homeowners make. A professional assessment can determine if the padding is salvageable or if it needs to be removed to protect your subfloor and air quality.
How to Know When Your Carpet Is Completely Dry
After all your hard work, you might be tempted to declare the carpet dry as soon as it feels okay to the touch. But hold on—moisture can be sneaky, hiding deep in the carpet fibers, the padding, and even the subfloor beneath. Simply feeling the surface isn’t enough to confirm the job is done. If you move your furniture back too soon, you risk trapping that hidden moisture, which is a perfect recipe for mold, mildew, and unpleasant odors.
To be truly sure your carpet is dry, you need to use a few different senses and understand what to look for. It’s about more than just a surface-level check; it’s about ensuring your home is safe and healthy. Pay close attention to how the carpet looks, feels, and smells. These clues will tell you whether you’ve successfully dried everything out or if there’s still more work to do. Knowing these signs can save you from much bigger headaches down the road.
Check for Dampness by Touch and Sight
The most straightforward method is the touch test, but you need to be thorough. Press a clean, dry paper towel firmly into the carpet, especially in the deepest parts of the pile. If it comes up with any dampness, you still have moisture. Don’t just check one spot in the middle of the room; test areas near walls, in corners, and under where furniture used to be. Sometimes, a wet carpet doesn’t look obviously wet. Keep an eye out for any discolored or darker patches, as this can be a sign that moisture is still present just below the surface.
Watch Out for Musty Smells or Mold Growth
Your nose is one of your best tools in this process. A persistent musty or earthy smell is a major red flag that mildew or mold has started to grow. Once mold gets into the carpet padding, it’s nearly impossible to remove completely and can negatively affect your home’s air quality. If you see any visible signs of mold—like black, green, or white spots—the problem is already significant. At this point, you’re dealing with more than just a wet carpet; you may need professional environmental cleanup to safely handle the contamination and protect your family’s health.
Understand the Typical Drying Timeline
While there’s no magic number, a carpet should ideally be dry within 24 to 48 hours. The longer it stays wet, the higher the risk of permanent damage and mold growth. If your carpet has been wet for more than three days, the chances of mold developing increase dramatically. After a week, you should assume the padding is compromised and will likely need to be replaced. Acting quickly is key. If the drying process is taking too long or the initial water damage was extensive, it’s time to call for professional water damage restoration to prevent long-term issues.
When Is It Time to Call a Professional?
While tackling a wet carpet yourself can work for minor spills, some situations are too big, too messy, or too dangerous to handle alone. Knowing when to step back and call for help can save you from bigger headaches like structural damage, lingering odors, and serious health risks. If you’re facing a massive amount of water, potential contamination, or signs of mold, it’s time to bring in the experts. A professional team has the industrial-grade equipment and certified training to safely manage the situation and prevent long-term problems. When you’re standing in a puddle and feeling overwhelmed, remember that a quick call for emergency water damage services is the smartest first step toward getting your home back to normal.
The Water Isn’t Clean (Sewage or Floodwater)
If the water on your carpet isn’t from a clean source, stop what you’re doing immediately. Water from a toilet overflow, a sewer backup, or outside flooding is considered “black water.” It’s contaminated with bacteria, viruses, and other harmful microbes that pose a significant health risk to you and your family. Trying to clean this yourself without proper protective gear and sanitizing agents can lead to illness. Professionals are equipped to handle these hazardous situations safely, often recommending the complete removal of the affected carpet and padding to ensure your home is properly decontaminated. Don’t take a chance with your health when dealing with sewer backups.
The Carpet is Completely Soaked
There’s a big difference between a spilled glass of water and a carpet that is completely saturated from a burst pipe or major leak. When the carpet padding is soaked through, it’s nearly impossible to dry it effectively with household fans or a shop vac. The padding acts like a giant sponge, trapping moisture against your subfloor. If it stays wet for more than a day or two, it becomes a breeding ground for mold and mildew, and the material itself will start to break down. A professional water damage restoration team uses powerful, commercial-grade extractors and air movers to pull moisture from both the carpet and the pad, drastically speeding up the drying process.
You Suspect Damage to the Subfloor
The carpet is just the top layer. Underneath it, you have the padding and the subfloor, which is the foundation of your room. If water has been sitting for an extended period or the leak was substantial, that moisture has likely soaked through to the subfloor. Signs of this include squishy spots when you walk, warped baseboards, or a musty smell that won’t go away. A damp subfloor can lead to rot, mold, and serious structural issues that are expensive to fix. A professional can pull back the carpet to properly assess and dry the subfloor, ensuring the structural integrity of your home isn’t compromised. This is a critical step in a complete restoration project.
You Already See or Smell Mold
If you can see or smell mold, the problem has already advanced beyond a simple DIY drying job. Mold can begin to grow in as little as 24 to 48 hours in damp conditions. It often appears as black, green, or white splotches and is usually accompanied by a distinct musty, earthy odor. Once mold gets into your carpet fibers and padding, it’s incredibly difficult to remove completely. Attempting to clean it yourself can release spores into the air, spreading the problem to other areas of your home and creating a health hazard. Professionals are trained in safe mold remediation and environmental cleanup to contain and eliminate the growth without cross-contamination.
Related Articles
- Best Carpet Cleaning Tampa, FL: A Local’s Guide
- A Step-by-Step Guide to Repair Drywall Water Damage
- The Emergency Water Removal Process: 4 Key Steps
- Flood Damage Restoration: A Step-by-Step Guide
Frequently Asked Questions
My carpet feels dry, but there’s a musty smell. What should I do? That musty, earthy odor is a major red flag. It almost always means that moisture is still trapped deep in the carpet padding or the subfloor, creating an ideal environment for mold and mildew. Even if the surface fibers feel dry to the touch, that smell tells you the problem isn’t fully resolved. Your best move is to call a professional who can use moisture meters to find the hidden dampness and address any potential mold growth before it spreads.
Can I save my carpet padding if it gets wet? It’s extremely difficult to save carpet padding once it has been soaked. The material is essentially a dense sponge, and trying to dry it completely with DIY methods is nearly impossible. Any moisture left behind will almost certainly lead to mold, unpleasant odors, and can even start to rot your subfloor. For the health of your home, the safest and most reliable solution is to have the wet padding removed and replaced.
How long is too long for a carpet to be wet? You have a critical window of about 24 to 48 hours to get a carpet completely dry. After two days, the risk of mold and bacteria starting to grow increases dramatically. If your carpet is still wet after three days, you should assume the padding is compromised and the potential for damage to the subfloor is high. Acting with urgency is the key to preventing a much bigger problem.
I can’t move a huge piece of furniture off the wet carpet. What’s the best way to handle it? If a piece of furniture is just too heavy to move to a dry spot, you can still protect it and help the carpet underneath. Carefully lift each leg or corner and place something waterproof underneath it. Small wood blocks, plastic containers, or even squares of aluminum foil work well. This prevents furniture stains from bleeding into the carpet and, more importantly, allows air to circulate underneath to aid in drying.
Is it safe to just use a regular household vacuum to suck up the water? Absolutely not. You should never use your standard household vacuum to clean up water. These machines are designed for dry debris only, and introducing water can destroy the motor and create a dangerous risk of electrical shock. The right tool for the job is a wet/dry vacuum, often called a shop vac, which is specifically built to handle water safely.