The stress of discovering a bathtub leaking to downstairs often comes from the unknown. Is it a simple fix or a major catastrophe? How much damage is happening behind the ceiling? Gaining a clear understanding of what could be causing the leak is the first step toward taking control of the situation. The problem could be as simple as a worn-out gasket that costs a few dollars to replace, or it could be a more complex issue with the plumbing hidden in your floor. This guide is here to demystify the process. We will explore the most common causes, teach you how to perform simple tests to find the source, and help you recognize the clear signs that mean it’s time to call for professional help.
Key Takeaways
- Pinpoint the Problem with Simple Tests: You can often find the leak’s origin yourself by methodically checking the drain, overflow, and caulk seals with water. Isolating the source is the first step to understanding the scope of the repair.
- Your First Move Is Damage Control: As soon as you spot a leak, shut off the main water valve. Then, contain drips and remove standing water to prevent the problem from escalating into a major structural or mold issue.
- Recognize When to Call for Help: While tightening a fitting or recaulking is often a manageable DIY fix, leaks behind walls, cracks in the tub, or significant water stains are clear signs you need a professional to avoid making the problem worse.
Why Is My Bathtub Leaking Through the Ceiling?
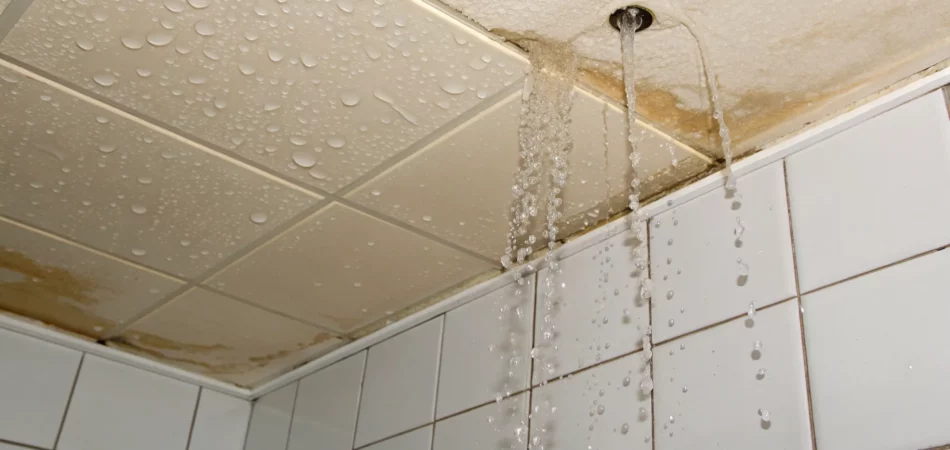
Seeing a dark, damp spot appear on your ceiling is a moment that can make any homeowner’s heart sink. When that stain is located directly below an upstairs bathroom, your bathtub is the prime suspect. A leaking tub is more than just an annoyance; it’s a sign that water is escaping and traveling where it shouldn’t, threatening your home’s structural integrity and creating the perfect environment for mold. The good news is that you’re not alone—this is a very common household problem. The leak could be from a sudden failure, like a burst pipe, or it could be a slow, sneaky drip that has been happening for weeks or even months. The key is to identify the source as quickly as possible to stop the flow of water. From there, you can assess the damage and figure out the right fix. Understanding the most common failure points, from worn-out seals around the drain to hidden cracks in the tub itself, will give you a clear path forward. This knowledge helps you troubleshoot the issue and decide whether it’s a simple DIY fix or a job that requires professional attention to prevent a small problem from becoming a major disaster. Let’s walk through the most likely culprits behind that unwelcome water stain.
Faulty Drain and Overflow Parts
One of the most frequent reasons for a bathtub leak is a problem with the drain assembly. This system is more than just the drain you see; it includes hidden pipes, gaskets, and seals that guide water away. Over time, the rubber or plastic gaskets that create a watertight seal can dry out, crack, and fail. The overflow drain—that small plate with holes near the top of the tub designed to prevent floods—also has a gasket that can wear out. When these parts fail, water that goes down the drain or into the overflow can escape before it reaches the main plumbing line, seeping into your floor and the ceiling below. This type of leak often happens only when the tub is draining or during a bath.
Worn-Out Caulk and Grout
Think of caulk and grout as the primary barrier around your tub. They seal the seams between the tub and the surrounding walls, preventing splashes and shower spray from getting where they don’t belong. However, caulk and grout don’t last forever. They can shrink, crack, and pull away from the wall, creating tiny pathways for water to sneak through with every shower. Even a small amount of water seeping into the wall cavity can lead to significant issues over time. This moisture can cause wood to rot, drywall to soften and crumble, and create the perfect conditions for mold growth. If the leak only appears after a shower, failing seals are a very likely cause of the water damage restoration you now need.
Loose Plumbing Connections
Behind your wall and beneath your tub are several plumbing connections that bring water to your faucet and carry it away through the drain. These fittings can sometimes loosen over time due to your home settling, vibrations from pipes, or changes in water pressure. A loose supply line to the faucet or a poorly sealed P-trap under the drain can create a slow, persistent drip that goes unnoticed for a long time. Because these leaks are completely hidden from view, you often won’t know there’s a problem until you see the telltale water stain on your ceiling. This is why any new stain warrants an immediate investigation, as a small drip can eventually cause major structural problems if left unaddressed.
Cracks or Damage to the Tub
While it might seem unlikely, the tub itself can be the source of the leak. Fiberglass and acrylic tubs can develop hairline cracks from heavy impacts, stress from improper installation, or simple wear over the years. These cracks can be incredibly difficult to spot, especially when the tub is dry. When you fill it with water, the weight can cause the crack to open just enough to let water seep out slowly. If you suspect a crack, you can try filling the tub with a bit of water and watching closely for any signs of leakage. Finding these hidden issues often requires professional leak detection to confirm the source without causing unnecessary damage to your bathroom or the ceiling below.
How to Pinpoint the Leak’s Location
Okay, let’s play detective. Finding the exact source of the leak is your first mission, and it can save you a lot of time and stress. A bathtub has several potential failure points—the drain, the faucet, the overflow, the caulk, and even the tub itself. By systematically checking each one, you can narrow down the culprit. Sometimes the problem is obvious, like a visible crack in the tub. Other times, it’s a sneaky, slow drip hidden behind a wall.
Before you start, make sure the area is dry. Grab a flashlight and some paper towels, as they can help you spot fresh moisture. The goal here is to recreate the leak under controlled conditions so you can see exactly where the water is coming from. This process might take a little patience, but isolating the problem is half the battle. If you can tell a professional exactly when and how the leak happens, they can get to the root of the issue much faster. And if the source is still a mystery after your investigation, specialized leak detection services can pinpoint it without tearing up your bathroom.
Perform a Visual Inspection
Start with what you can see. A careful visual check of your tub and the surrounding area can often reveal the source of the problem without any complicated tests. Begin by examining the caulk and grout lines around the entire tub. Look for any sections that are cracked, peeling, or missing altogether. These gaps are common entry points for water. Next, inspect the surface of the tub itself for any cracks, especially around the drain and corners. Don’t forget to check the floor around the base of the tub for any signs of moisture or water damage. If you have access to the room below, look up at the ceiling for water stains, discoloration, or bubbling paint, which are tell-tale signs of a persistent leak.
Use Water to Test Different Areas
If a visual inspection doesn’t reveal the problem, it’s time to test different components with water. This helps you isolate the leak. First, test the drain seal. Plug the drain and fill the tub with a few inches of water. Let it sit for about 15-20 minutes without running any more water, then check the ceiling below for any new dampness. If a spot appears, your drain is the likely culprit. If not, drain the tub and move on to testing the faucet and showerhead. Run the shower for several minutes, directing the water away from the overflow plate, and check again for leaks. This will test the supply lines and faucet connections.
Check the Overflow Gasket and Drain
Two of the most common sources of bathtub leaks are the overflow drain and the main drain assembly. The overflow is that little plate with a hole or two, located a few inches below the rim of the tub. Behind it, a rubber gasket creates a seal. Over time, this gasket can dry out, crack, and fail. A tell-tale sign of a bad overflow gasket is a leak that only appears when the tub is full of water. To test it, plug the main drain and fill the tub until the water level rises above the overflow plate. If water starts dripping downstairs, you’ve found your problem. The main drain at the bottom of the tub also has seals that can wear out, causing a leak whenever water is in the basin.
Examine the Water Stains Below
The water stain on your ceiling is more than just an eyesore—it’s a clue. The appearance and location of the stain can tell you a lot about the leak. A large, spreading stain often points to a significant issue, like a burst pipe or a major drain failure. On the other hand, a small, concentrated, and dark-colored stain usually indicates a slow, steady drip that has been happening for a while. Keep in mind that water can travel along ceiling joists and pipes before it soaks through your drywall. This means the stain might not be directly underneath the source of the leak. If you’re dealing with widespread water damage, it’s crucial to call for professional water damage restoration to prevent structural issues and mold growth.
Found a Leak? Here Are Your First Steps
Discovering a water stain on your ceiling is a moment of pure panic. But before you get overwhelmed, take a deep breath. Acting quickly and methodically can make a huge difference in minimizing the damage to your home. The next few steps are critical for getting the situation under control before a professional arrives. Think of it as first aid for your house—these actions will stabilize the problem and prevent it from getting worse while you wait for help.
Shut Off the Water Immediately
Your absolute first priority is to stop the flow of water. If you don’t, the damage will continue to spread. The fastest way to do this is by shutting off the main water valve to your entire house. It’s usually located where the main water pipe enters your home, often in a utility closet, basement, or garage. Turn the valve clockwise until it’s completely closed. If you know which valve controls the water supply just to the leaking bathroom, you can shut that off instead. Taking this immediate step is the most important thing you can do to prevent a small leak from turning into a major emergency water damage event.
Control the Damage and Remove Water
Once the water is off, it’s time to manage the water that has already escaped. Place buckets or pans under any active drips to catch the remaining water. Use towels, mops, and a wet/dry vacuum to remove as much standing water as possible from floors and surfaces. The goal is to get everything as dry as you can, as quickly as you can. Drying wet spots promptly helps stop moisture from seeping deeper into your home’s structure, which is crucial for preventing the growth of mold. Even if it seems like a small amount of water, thorough cleanup is a key part of the water damage restoration process.
Protect Your Property and Electronics
Water can cause irreversible damage to your belongings. Carefully move any furniture, rugs, electronics, and personal items out of the affected area. Water can spread behind walls and under flooring, so check adjacent rooms and closets for any signs of moisture. Be especially cautious around any electrical outlets, lights, or appliances that may have been exposed to water. If you have any concerns about electrical safety, it’s best to turn off the power to that area at the circuit breaker. Protecting your property now will make the complete restoration of your space much smoother.
Document Everything for Your Insurance Claim
Before you clean up too much, pull out your phone and take plenty of photos and videos. Document the source of the leak if you can see it, the water stains on the ceiling, and any damaged property. This evidence will be essential for your homeowner’s insurance claim. It’s important to know that while insurance may not cover the cost of fixing the leak’s source (like a worn-out pipe), it often covers the resulting water damage. Keep a log of everything you do and everyone you speak to. When you’re ready, contact us, and we can help guide you through the insurance process and get your home back to normal.
Should You DIY the Repair or Call a Professional?
When you see a water stain spreading across your ceiling, your first instinct might be to grab a toolbox and tackle the problem yourself. It’s tempting to try and save some money, and for very minor issues, a DIY approach can work. However, what looks like a small leak can often be a symptom of a much larger problem hidden behind your walls or under your floor. Making the wrong move can turn a simple repair into a major catastrophe, leading to more extensive water damage and higher costs.
Deciding whether to fix it yourself or call in a professional comes down to honestly assessing your skills, the tools you have, and the complexity of the leak. Some fixes are straightforward, but many plumbing and water damage issues require specialized knowledge to diagnose and repair correctly. Before you start unscrewing pipes, it’s important to understand the difference between a quick fix and a job that’s best left to the experts. We’ll walk through some simple things you can check, the tools you’d need, and the clear warning signs that mean it’s time to pick up the phone.
Simple Fixes You Can Tackle Yourself
If you’re feeling confident, there are a couple of diagnostic tests you can run to narrow down the source of the leak. First, if you have an access panel in a closet or an adjacent room, take a look at the pipes under the tub. A quick visual inspection might reveal an obvious drip from a connection that you can simply tighten.
Another easy test can help you figure out if the problem is with your drain. Try running only the shower for about 15 minutes. If no leak appears downstairs, turn the shower off and fill the tub, letting the water sit for a bit. If the leak starts now, the culprit is very likely a faulty overflow gasket—the seal behind the overflow plate on the front of your tub. This is often a manageable fix for a handy homeowner.
Essential Tools for a DIY Repair
Before you even think about starting a repair, make sure you have the right equipment. Scrambling for tools mid-job is a recipe for disaster. For a basic bathtub leak repair, you’ll want to have a few key items on hand. A good screwdriver set is a must, along with channel locks for gripping and turning pipes and fittings. You’ll also likely need needle-nose pliers, which are perfect for carefully removing the drain assembly.
To create a watertight seal, you’ll need plumber’s putty for setting the drain and plumber’s tape (also called silicone tape) for wrapping the threads on any connections. Having these essentials ready will make the process smoother and reduce the risk of creating a new leak while you’re trying to fix the old one.
Red Flags: When to Call for Help
While it’s great to be self-sufficient, some situations are clear signals to call for professional help. If you’ve determined the leak is coming from a pipe or fitting under the tub and there’s no access panel, the ceiling below will need to be opened up. This is a job for a professional who can handle both the plumbing and the subsequent water damage restoration.
Other red flags include visible cracks in the tub itself or signs that the drain seals are completely broken. If you suspect the problem is more than just a loose connection, it’s best to get an expert opinion. Attempting complex repairs without the right experience can lead to bigger problems, so when in doubt, contact an emergency plumbing service to get it handled correctly the first time.
Common DIY Mistakes That Worsen the Problem
Even with the best intentions, DIY plumbing can go wrong quickly. One of the most common mistakes is simply buying the wrong parts for your specific tub or faucet model. Another frequent error is over-tightening fittings, which can crack the connections and create a brand-new leak. Trying to work on pipes that aren’t completely dry or cutting them incorrectly can also turn a small issue into a major one.
Many bathtub clogs are caused by hair, and using harsh chemical drain cleaners can damage your pipes over time. If a simple fix doesn’t work, it’s easy to make the problem worse. These small mistakes can lead to burst pipes and significant water damage, underscoring why a professional is often the safest and most cost-effective bet in the long run.
The Dangers of Ignoring a Bathtub Leak
That small, discolored spot on your ceiling might seem like a minor cosmetic issue, but it’s often the first sign of a much bigger problem. Ignoring a bathtub leak, even a slow drip, can lead to a cascade of issues that threaten your home’s structure, your family’s health, and your finances. It’s one of those situations where acting fast makes all the difference. Procrastination allows a manageable problem to spiral into a full-blown restoration project. Let’s walk through exactly what’s at stake when you put off dealing with a leak.
Risk of Structural Damage to Your Home
A persistent leak from your bathtub is a direct threat to your home’s framework. Water is incredibly destructive over time, and the materials that make up your floors and ceilings are particularly vulnerable. That damp spot on the ceiling below your bathroom means water has already saturated the drywall, insulation, and potentially the wooden joists that support the floor. As these materials absorb moisture, they weaken, swell, and can begin to rot. This compromises the structural integrity of your home, turning a simple leak into a serious safety hazard. Professional water damage restoration is often necessary to properly dry out these hidden spaces and repair the underlying damage before it gets worse.
The Threat of Mold and Health Issues
Where there’s persistent moisture, mold is sure to follow. It only takes 24 to 48 hours for mold spores to begin growing on damp surfaces like drywall, wood, and insulation. A hidden bathtub leak creates the perfect dark, damp environment for mold to thrive undetected within your walls and ceilings. This isn’t just an ugly problem; it’s a health risk. Mold releases spores into the air that can trigger allergic reactions, asthma attacks, and other respiratory problems. If you or your family members have been experiencing unexplained coughing, sneezing, or headaches, a hidden leak could be the culprit. An environmental cleanup is essential to safely remove the mold and address the moisture source.
Potential Electrical Safety Hazards
Water and electricity are a dangerous combination, and a leak from an upstairs bathroom can create a serious electrical hazard. Water can seep into light fixtures, outlets, and junction boxes in the ceiling below, short-circuiting wiring and creating a risk of electrical shock or even fire. Because much of your home’s wiring is hidden behind walls and above ceilings, you may not realize the danger until it’s too late. If you have a leak and the lights start to flicker or an outlet stops working, treat it as an emergency. Immediately shut off the power to that area at the breaker box and call for emergency water damage assistance.
Skyrocketing Repair Costs Over Time
It’s simple: the longer you wait, the more expensive the repair will be. A quick plumbing fix for a leaky drain might cost a couple of hundred dollars. But if you ignore it, that cost multiplies. Soon, you’re not just paying a plumber; you’re also paying for drywall replacement, new paint, mold remediation, and potentially structural repairs to rotted floor joists. Plumbers often have to cut into the ceiling just to find the source of the leak, which adds to the repair work. Acting quickly is the best way to protect your wallet. A small investment in an immediate repair can save you from needing a complete restoration project that costs thousands.
Related Articles
- Bathtub Leaking Into Ceiling Below: Why & How to Fix It – Drywizard Restoration & Drywall Inc.
- How to Fix a Ceiling Leak From an Upstairs Bathroom – Drywizard Restoration & Drywall Inc.
Frequently Asked Questions
Will my homeowner’s insurance cover the damage from a leaking bathtub? This is one of the first questions homeowners ask, and the answer usually depends on the source of the leak. Most standard insurance policies cover the damage caused by sudden and accidental water discharge, like a burst pipe. This means they would likely pay for repairing the soaked ceiling and floor. However, the policy typically won’t cover the cost of fixing the source of the leak itself, especially if it’s due to a lack of maintenance, like old, worn-out caulk. It’s always best to document the damage with photos and contact your insurance agent right away to understand your specific coverage.
The leak has stopped. Can I just paint over the water stain on my ceiling? It’s tempting to go for a quick cosmetic fix, but painting over a water stain is a bad idea. The stain is just the visible symptom; the real problem is the moisture trapped inside your ceiling and floor structure. Even if the leak is fixed, that trapped water can lead to wood rot, structural decay, and mold growth behind the paint. The only way to properly handle it is to ensure the area is professionally dried out and any damaged materials are replaced before you even think about picking up a paintbrush.
How quickly does mold start to grow after a leak? Mold can begin to grow surprisingly fast. In the right conditions—which a damp, dark ceiling cavity certainly provides—it can start developing in as little as 24 to 48 hours. This is why acting quickly is so critical. Simply stopping the leak isn’t enough. You have to address the moisture immediately to prevent a small water issue from turning into a significant mold problem that can affect your home’s air quality and your family’s health.
My ceiling is stained, but how do I know if it’s the tub or the toilet leaking? This is a great question, as both can cause similar-looking damage. A good way to start is by checking the base of your toilet. If you see water pooling there or if the floor feels soft and spongy, the toilet’s wax ring may have failed. If the base is dry, pay attention to when the leak appears. If the drip on the ceiling below only happens when you take a shower or drain the tub, your bathtub is almost certainly the culprit. If it happens after you flush, the toilet is the prime suspect.
What’s the difference between calling a plumber and a restoration company? Think of it this way: a plumber fixes the source of the leak, while a restoration company fixes the mess the leak created. You’ll call a plumber to repair the broken pipe, replace the faulty drain, or fix the faucet. You call a restoration company like Drywizard to handle the aftermath. We specialize in safely drying out the structure, tearing out damaged materials like drywall and insulation, preventing mold growth, and rebuilding the area to get your home back to its original condition.